REVIEW · SEOUL
DMZ Guided Tour with Suspension Bridge / Gondola from Seoul
Book on Viator →Operated by Korea Time Tour · Bookable on Viator
The DMZ is one long, controlled reality check. This guided day out of Seoul takes you through the buffer between North and South Korea, with major stops like the Third Tunnel and Dora Observatory. If the weather cooperates, you also get a rare chance to look toward North Korea from the southern side.
I love how simple the planning feels: round-trip transfers, an air-conditioned vehicle, and an English-speaking guide/driver that keeps the day moving. I also love the value for the price, because admission tickets are bundled with the core sites, not tacked on later.
My main caution is that your day can hinge on visibility and timing. Fog or poor weather can reduce what you see from Dora, and the schedule is strict with timed entry and a fair amount of walking, especially for the tunnels.
In This Review
- Key things that make this DMZ tour work
- Price and value: why $35 can still feel like a full-day deal
- How the day runs from Seoul: transfers, timed entry, and low-stress logistics
- Stop 1: DMZ basics first, so the rest of the day makes sense
- The Third Tunnel: the “how could this happen” moment
- Dora Observatory: North Korea views depend on the sky, not hope
- Optional suspension bridge or gondola: pick your photo vibe
- Stop 5 on Mon: the Second Tunnel route (and why the weekday matters)
- Walking reality check: what to do if your body isn’t into steep slopes
- Guides make the history land: Patrick, Roy, Ki, Andrew, April, and Mac
- Meals, timing breaks, and the day-long energy plan
- Who should book this DMZ tour, and who should skip it
- Should you book: my decision guide for the DMZ with bridge/gondola
- FAQ
- What is the duration of the DMZ guided tour from Seoul?
- Which tunnel and observatory are visited on different days?
- Is the gondola or suspension bridge included?
- What’s included in the ticket price?
- Can I meet a North Korean defector on this tour?
- Are there restrictions for entering the Third Tunnel?
- What happens if the tour is canceled due to weather or politics?
Key things that make this DMZ tour work
- A/C round-trip transfers and an English-speaking guide/driver mean you don’t have to map the day yourself
- Third Tunnel + Dora Observatory on most days gives you the emotional and historical center of the DMZ experience
- Optional gondola or suspension bridge lets you choose a photo-focused add-on near the DMZ area
- Monday is Tunnel 2 day, so your specific route changes with the day of the week
- Weather matters: clear days improve your odds of seeing toward North Korea from Dora Observatory
Price and value: why $35 can still feel like a full-day deal
At $35 per person for a day that runs roughly 7 to 11 hours, the value comes from what’s bundled. You’re not just paying for a bus and a ticket handoff. Admission is included for the DMZ-area attractions on the standard route, and you also get guided interpretation and transfers.
That matters in Korea. Independent DMZ planning can mean chasing timed entries, coordinating transport, and trying to stitch together several sites in one day. Here, you trade a bit of freedom for a structured itinerary—and most people like that trade.
If you’re budgeting, take a close look at the optional parts. The gondola/cable car and the suspension bridge are both optional, and you choose when you book. If you want the best photo angles or a bit of scenic variety, build that into your decision up front.
You can also read our reviews of more guided tours in Seoul


How the day runs from Seoul: transfers, timed entry, and low-stress logistics
This tour avoids the hardest part of DMZ travel: logistics. You ride in an air-conditioned vehicle and get round-trip transfers. You also get a mobile ticket, which makes check-in easier when you’re bouncing between sites.
That said, DMZ access is time-slot driven. In real life, you’ll want to be ready at the pickup point and prepared for the day to run like a schedule drill. One review called out that things can run late in rare cases and that timing can feel chaotic on that particular day, but the overall feedback points to organization and clear guidance.
Bottom line: if you hate strict timing, bring a calm attitude. If you’re okay with a controlled day plan in exchange for seeing multiple major sites, this tour style fits well.
Stop 1: DMZ basics first, so the rest of the day makes sense
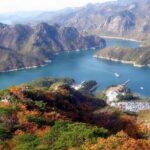
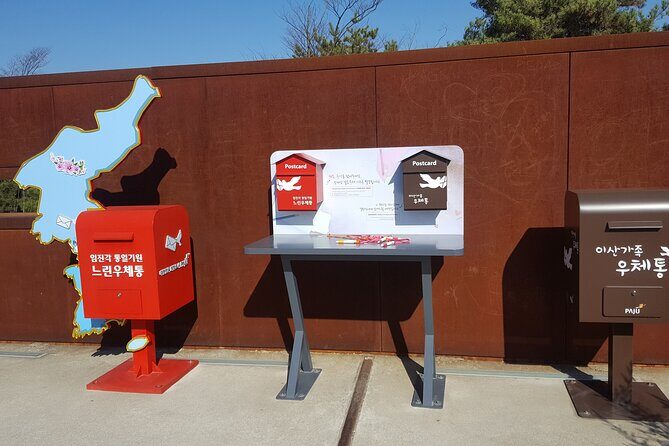
Your first stop is the DMZ itself, the buffer zone between North and South Korea. The DMZ stretches across about 248 km from Jeongdong-ri in Paju to Myeongho-ri in Goseong-gun, and the tour frames it as a physical boundary shaped by history and ongoing tension.
Why start here? Because later stops are more specific and more intense (tunnels, observatories). Seeing the DMZ as a defined zone first helps you connect the dots instead of treating each site like a standalone “attraction.”
Practical tip: wear comfortable shoes and plan for a day outdoors with walking. Even if you don’t do extra hiking sections, this is still a long day and you’ll move between checkpoints.
The Third Tunnel: the “how could this happen” moment
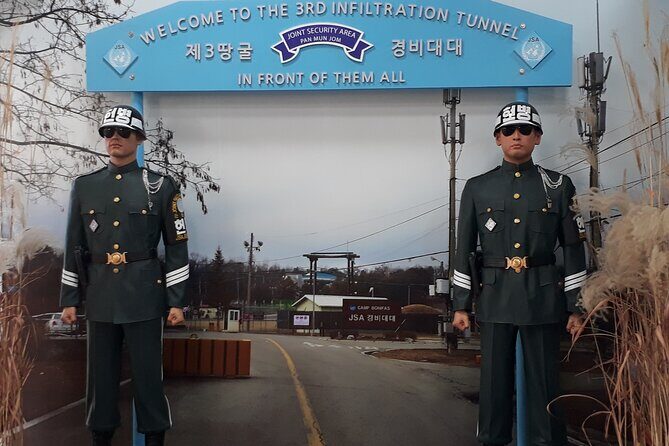
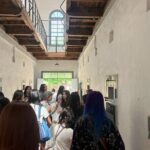
On most days (Tue–Sun), the tour includes the Third Tunnel. South Korea discovered it in 1978. It’s long—about 1,635 meters—with tight dimensions (around 2 meters wide and 2 meters high). You’re not crawling through a fantasy set; you’re walking through a real engineering attempt that reflects the fear and planning that shaped the peninsula.
This is also where the tour becomes physically demanding for some people. The tour info notes that if you have heart disease or leg/back/respiratory problems, you can’t enter the Third Tunnel. It also notes intermediate-level hiking and that you may have to walk steep sections. One review warned about steep down and back up movement, plus slick footing risk, so if stairs or slopes are hard for you, take that seriously.
If you’re able-bodied and prepared, this stop is the one that turns “history lesson” into something you can feel in your body.
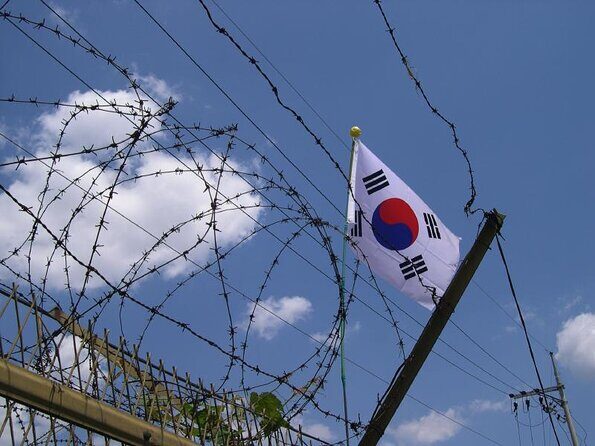
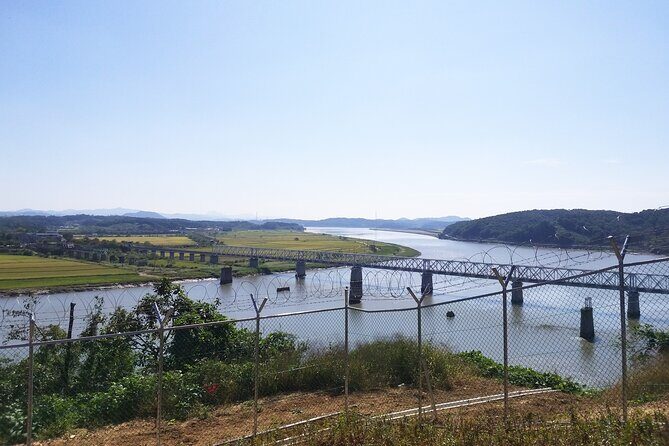
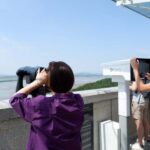
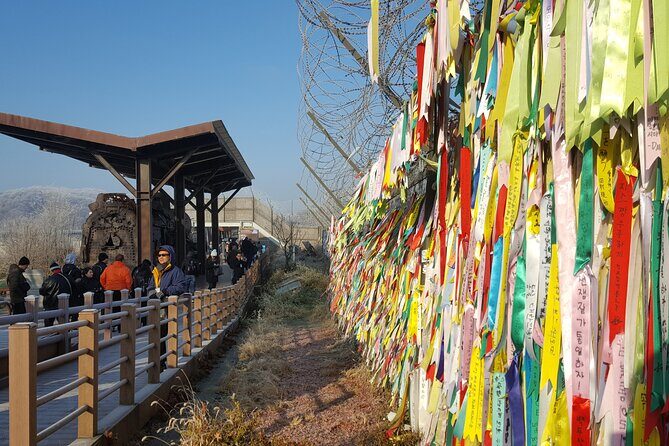
Dora Observatory: North Korea views depend on the sky, not hope
Dora Observatory is the emotional anchor of many DMZ tours. From here, you can see North Korea on clear days. The idea isn’t just sightseeing—it’s witnessing how close these two sides really are, even with the DMZ between them.
Your day also ties into other parts of the area: you’ll hear about Dorasan Station (the last station in South Korea) and related context tied to what’s visible from the observatory viewpoint.
What to plan for:
- Fog can dramatically cut what you can see. Several reviews mention reduced visibility (one specifically called out fog).
- Weather affects not only views but your overall comfort outdoors.
If you want the best shot at seeing toward North Korea, choose a day with better weather if you can. And go easy on expectations if the forecast looks murky.
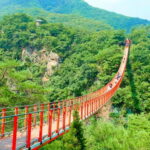
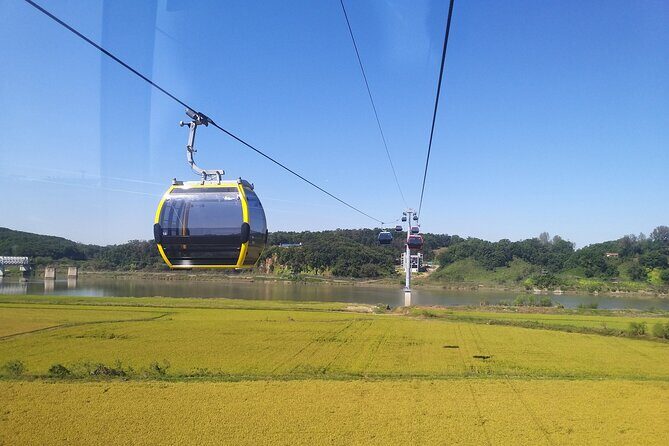
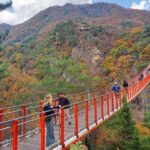
Optional suspension bridge or gondola: pick your photo vibe
You’ll have an option to add either the cable car (gondola) and/or visit a suspension bridge, depending on what you select when booking.
- The suspension bridge stop is listed as Gamaksan Chulleong Bridge near the DMZ area. It includes an extra viewpoint feel and is described as a place where black and blue lights can be seen simultaneously (so it’s designed for atmosphere and photos).
- Many people choose gondola for easier scenic shots, and at least one review explicitly recommends taking the gondola for better DMZ-area pictures.
Here’s how I’d choose:
If you want maximum scenic variety and plan to take photos all day, consider adding the gondola or bridge. If you’d rather keep the day lighter and don’t care about extra scenery, you might skip both and just focus on the tunnel and observatory stops.
One review noted that skipping the gondola at first didn’t shorten the day as much as expected, and they ended up adding it later—so decide early if you can, but don’t panic if your priorities shift mid-day.
Stop 5 on Mon: the Second Tunnel route (and why the weekday matters)
This tour changes by day of week.
- Every Monday: you go to the Second Tunnel, plus Peace Observatory, Woljeongri train station, and a suspension bridge stop. The route is designed around a tunnel that differs from the Tue–Sun plan.
- Every Tue–Sun: you visit the Third Tunnel and Dora Observatory, and you use the gondola or suspension bridge options based on what you booked.
Why this matters: if your calendar only allows a Monday, don’t expect the Third Tunnel. Some reviews explicitly noted that the Third Tunnel was closed on Mondays, which matches the weekday structure in the itinerary.
If you’re trying to “collect the famous stops,” check the day-of-week before you assume you’ll get the exact same sites as someone else’s video online.
Walking reality check: what to do if your body isn’t into steep slopes
DMZ days often look easy on paper. In real life, tunnels bring slopes, steps, and uneven surfaces.
The Third Tunnel is the big one for restrictions and physical effort. The tour info says you need intermediate-level hiking and that people with heart/leg/back/respiratory problems can’t enter. One review added practical detail: there’s a steep down and up walk (about 350 meters in each direction) and it can be wet or slippery.
So here’s my straight advice:
- Wear grippy shoes (not smooth sneakers).
- Pack for chilly or damp conditions even in mild seasons.
- If you need mobility help, ask yourself honestly whether steep, short climbs are okay for you.
You don’t have to “power through.” But if you skip the tunnel sections you miss a core part of the experience.
Guides make the history land: Patrick, Roy, Ki, Andrew, April, and Mac
Most of the standout praise centers on the guide. Several names show up repeatedly in reviews: Patrick, Roy, Ki, Andrew, April, and Mac.
What you should look for (and often get) is not just facts, but pacing and tone. Guides are praised for making a heavy subject more understandable and even more engaging without turning it into a joke-fest. One review specifically credited Patrick with entertaining and informative storytelling. Another highlighted Roy as friendly and engaging, and someone else praised Ki for keeping teenagers interested.
This tour is about tension, war, and political reality. A strong guide is what keeps it from becoming a rushed checklist.
Meals, timing breaks, and the day-long energy plan
Meals aren’t included. You’ll want to bring water and plan for food on your own. One review suggested bringing a bit of food because lunch might happen at the end of the day, which makes sense for an itinerary packed with timed stops.
If you’re sensitive to long days, treat this like a hiking day:
- Snack early.
- Don’t wait until you’re starving.
- Bring small items you can eat quickly between checkpoints.
Also remember: delays can ripple. If pickups or transitions run late, the later portion of the day can feel squeezed. Staying flexible—and fed—helps a lot.
Who should book this DMZ tour, and who should skip it
This tour is a great fit if you:
- Want a structured DMZ day without figuring out transit or timed entry
- Care about understanding the Korean War context through real sites
- Prefer guided interpretation and clear logistics
- Can walk comfortably and handle stairs or slopes for tunnel access
You should think twice or choose a different plan if you:
- Have medical limits related to tunnels (especially Third Tunnel restrictions)
- Struggle with steep walking or slippery surfaces
- Get stressed by strict schedules and time slots
- Want a relaxed, slow day without pressure to move
Should you book: my decision guide for the DMZ with bridge/gondola
Book it if you want the essentials: DMZ orientation, the tunnel experience, and Dora Observatory, with guided explanation and included admissions. It’s also strong for first-timers who don’t want to build a complex day plan from scratch.
Skip the extras and still book if your priority is the tunnels and observatory. Add gondola/suspension bridge if you want variety and photo-friendly angles near the DMZ area.
Choose your day carefully. If seeing toward North Korea matters to you, clear weather is the key factor, and fog can limit what you see from Dora Observatory.
And yes—plan to walk. If you’re ready for that, this is one of the most focused “history + place” experiences you can do from Seoul, priced so you won’t feel guilty about spending your whole day on it.
FAQ
What is the duration of the DMZ guided tour from Seoul?
The duration is listed as approximately 7 to 11 hours, depending on the route and timing between stops.
Which tunnel and observatory are visited on different days?
Every Monday focuses on the Second Tunnel route (along with Peace Observatory, Woljeongri train station, and a suspension bridge). Every Tue–Sun route includes the Third Tunnel and Dora Observatory, with gondola or suspension bridge options depending on what you selected.
Is the gondola or suspension bridge included?
It depends on what you choose when booking. The cable car (gondola) ticket and/or the visit to Suspension Bridge are included only if you selected that option.
What’s included in the ticket price?
Included items are round-trip transfers, an air-conditioned vehicle, admission to attractions, an English-speaking tour guide/driver, and admissions for the stops listed in the itinerary. Optional elements like meeting with a North Korean defector are included only if available/selected.
Can I meet a North Korean defector on this tour?
A meeting with a North Korean Defector is listed as optional within the tour inclusions. Whether it happens for your departure isn’t guaranteed in the information provided.
Are there restrictions for entering the Third Tunnel?
Yes. If you have heart disease or leg/back/respiratory problems, you cannot enter the Third Tunnel. It also requires intermediate-level hiking, and there is steep walking involved.
What happens if the tour is canceled due to weather or politics?
The tour can be canceled because of weather or political situation. If that happens, you’ll be offered a different date or a full refund.